I finally found the time, energy, and batteries to take
pictures of me in my Regency corset mock-up 2 / interlining. I’ve been sick and
busy in the last several weeks while trying to get my research project to the
point of IRB submission (which will be this Monday! I’m crossing my fingers it
won’t take too long for approval).
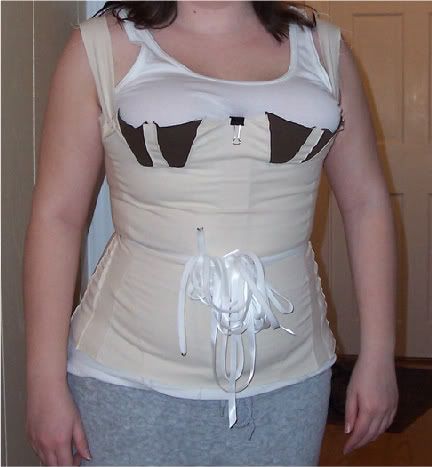 |
| Yes, I know it’s not good to tie your laces like that, but it’s convenient for fittings when you have three yards of excess lacing. :) |
Unfortunately, my roommate was busy playing Star Trek online
and Skype-ing with his friends, so I had to lace myself in this time. I also
felt weird about going into his room to use the full length mirror to lace it
myself (I knew he would have a running commentary about it), so I used the
small mirror in the bathroom. The top half of the waist is cinched in too much
and the bust isn’t tight enough, but it still looks ok. The bust isn’t as
supported as it was last time but only slightly. I used the binder clip to keep
the top edge of the fabric flush with the busk, which is what helps keep the,
er, “ladies” in place.
If you’re wondering why the bust gussets are a different
color, it’s because I used the test D+ gussets from my first mock-up on this
one. I’m going to replace them with the cotton drill before I put the layers
together.
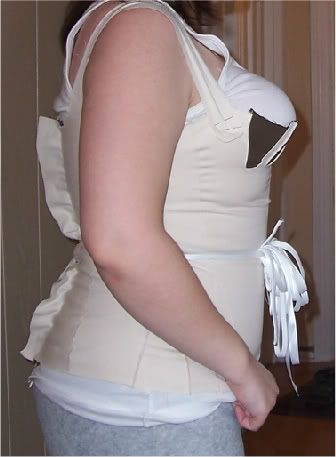 |
| Side view. I probably should have raised my arm for this photo. Oops. |
You can more or less see the classic Regency silhouette here. My cleavage was…well, let’s just say I’m glad I wore the neckline I did. O.o
The bust was more shapely when the corset was properly laced because there was
a bit more support and it wasn’t too tight along the underbust. It’s also helpful
if you can “place” yourself as you’re getting laced, which I wasn’t able to do.
You can also see the pins I used to attach the straps to the
front. I was quite impressed with myself for not sticking myself even once this
time! Hooray! I haven’t picked up a pin or needle in weeks without sticking
myself at least once. (I hope my tetanus shot is still good.) Anyway, for
anyone thinking of making this, do yourself a favor and make your straps longer
for your mock-up so that you won’t be slightly hunched over during your
fittings. It’s rather uncomfortable and hart to move your arms. I definitely
recommend making the straps for the mock-ups, though, because they help keep
things in place.
The only problem I see is that the front seems to be a tad b
bit too long. When I sit, the front curls up a couple of inches. I already have
the lining and cover fabrics cut out and sewn (aside from the gussets), so I’m
just going to put it together and trim it if needed once the bones are in (and
probably get shorter bones, if needed).
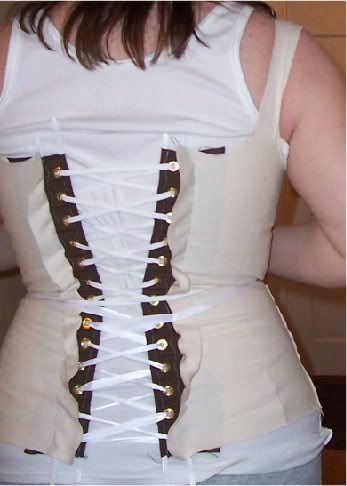 |
| Back view with my lovely lacing strips and grommets. |
Here you can see how wonky the lacing job is. When laced
properly, the CB is parallel with a gap of about 2 – 2.5 inches.
The straps typically are a little closer to CB, so they
normally lay better. Again, the lacing is off. Oops. You do have a nice view of
my lacing strips, though, and my lovely grommet settings. I only messed up on
one because it was slightly off center on the setter when I hit it and is
slightly smushed on the right side (the back is showing on this one).
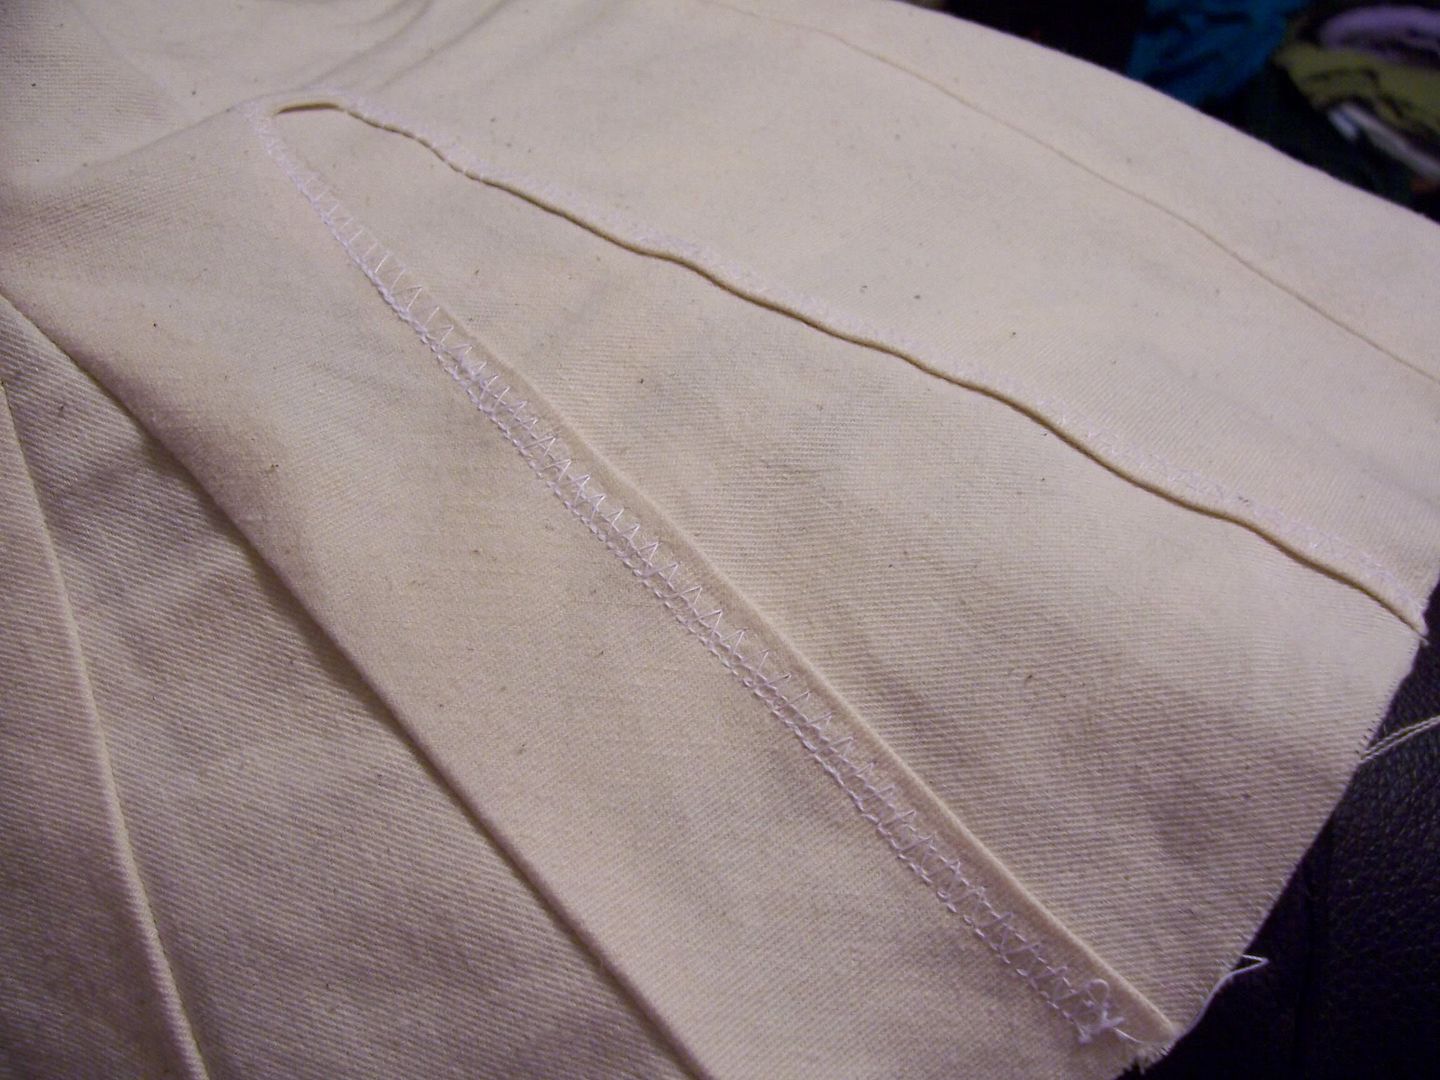 |
| Left back hip gusset |
I popped a poorly-sewn hip gusset the last time I did a fitting. The edge of the gusset was slightly frayed, so I just did a fancy zig-zag style stitch to fix it. It’s going to be on the inside, anyway. I might go over the other back hip gusset like this, just for added stability.
No comments:
Post a Comment